プログラムからStoryboardの画面遷移を実行する
プログラムからStoryboardの画面遷移を実行します。遷移先と遷移元を往来できるようになります。performSegueWithIdentifier dismissViewControllerAnimated メソッドで画面を遷移させます。
開発環境
完成予定図

Segue を設定
ViewControllerを追加してSegueを追加します。
では作ってみましょう。新規プロジェクトを作成します。テンプレートは Single View Application を選択し、プロジェクト名は Demo_Segueにしました。
-
Main.storyboard を開いて、ViewController を Object Library から追加します。違いが分かりやすいように背景色を変えました
-
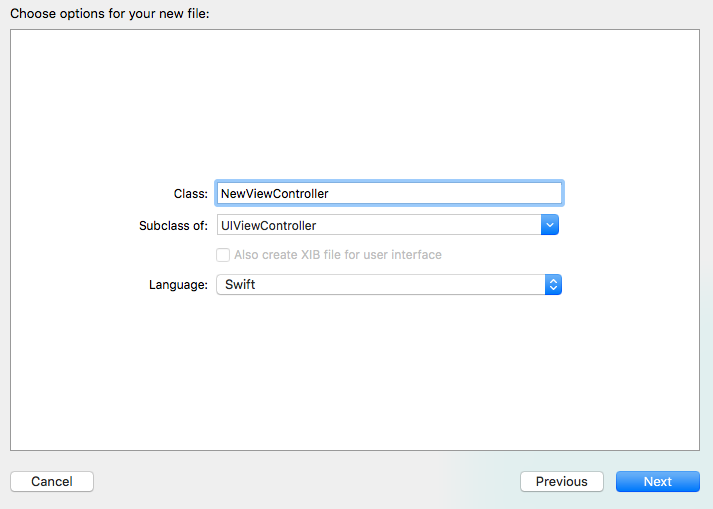
新規に Cocoa Touch ファイルを作成します。SubclassをUIViewControllerにして、ファイル名を NewViewController にしました。

-
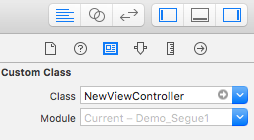
Main.storyboardに移動して、追加した方の ViewController の Custom Class を、NewViewController に設定します。

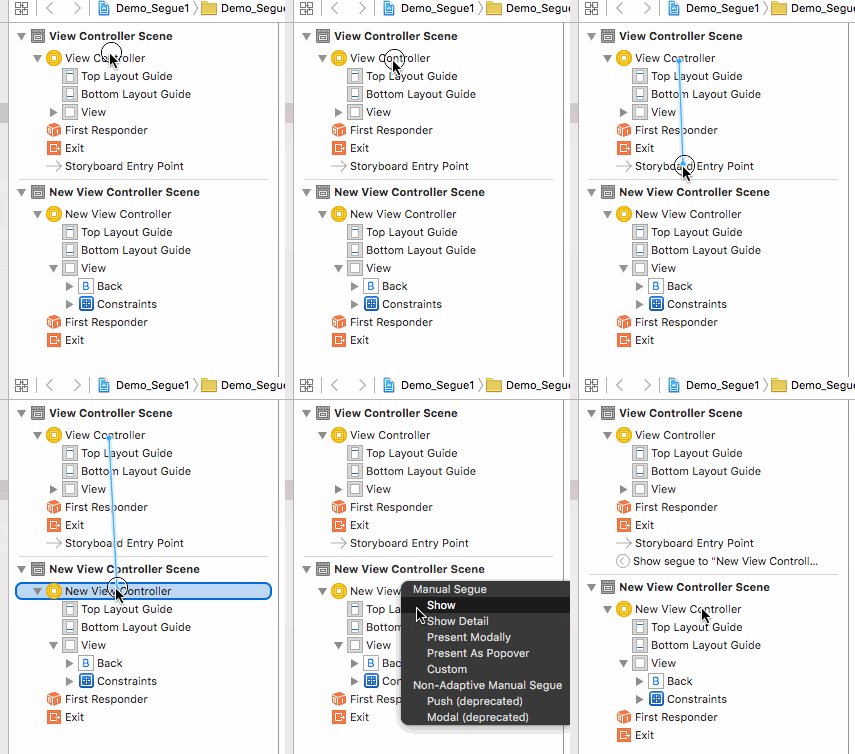
- Document Outline 画面で、ViewControllerを右クリックしたまま NewViewController までドラッグして離し、Segue の 種類を Show に設定します

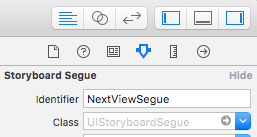
- 追加された Segue を Document Outline 画面で選択し、Attribute Inspecter 画面で Identifier を NewViewController に設定します

画面遷移のプログラムを書く
performSegueWithIdentifier dismissViewControllerAnimated メソッドで画面を遷移させます。
-
それぞれの ViewController の View に Button を一つずつ配置し、Action を それぞれの ViewController に以下のように関連付けます
クラス名 メソッド名 ViewController showNextViewController NewViewController showViewController - メソッド内に画面遷移のプログラムを書きます
これで完成です!実行してボタンを押してください。画面が遷移しましたか?
まとめ
画面をプログラムで遷移させるには2つのメソッドを使う
- performSegueWithIdentifier: 指定した Identifier の Segue を実行する
- dismissViewControllerAnimated: ViewController をメモリから削除する。その際、アニメーションを実行する